Existing member? Log in and continue learning

See if you like it, start the course for free!

Unlock full course by purchasing a membership
Introduction
Introduction
Have you had enough of the theory yet? We’ve covered a lot of stuff, and hopefully you’ve been able to try out some of that theory in practice as you follow along messing around with your own example app.
There is some more theory to come, but I don’t want to just keep throwing more and more theory at you without actually building something. That is what this module is for.
This module is not one of the “proper” application walkthroughs that we will tackle later. Those are entire real-world applications. The purpose of this module is going to be to build something super basic. We just want to have something functional that is more than rendering out a couple of inputs or a message to the screen.
We are going to use this application as an opportunity to start applying some of what we have learned so far, and we are also going to use it as an opportunity to see some of the things we are about to learn in the following modules.
As I keep mentioning, we haven’t really addressed the concept of observables and reactive programming yet (not in depth anyway). We also haven’t talked about application architecture and SOLID programming principles. I mentioned that this course is about teaching Angular the “hard” way, in a way that will lead you down a path to building your applications like the best modern Angular developers today generally do. These concepts are a big part of that.
So, as we build this simple application, I am going to start applying some of these concepts (just a little bit). Unless you have previous experience with these concepts I don’t expect you to fully understand what is going on or why we are doing certain things. The main point here is to expose you to the concepts a little bit, and hopefully the bits that seem strange or confusing to you will stand out. Then when we are addressing the theory of these concepts in more detail in the following modules, hopefully everything will stick a little easier because you have already seen it in context.
A Todo Application
It is the most cliche example ever, but it’s a great starting point. We are going to build a super simple todo application. All we want this application to do is:
- Allow us to create a todo with a
titleand adescription - Allow us to select a todo and view its details on a separate page
This is obviously not a complete todo application, but for now we want to just expose ourselves to a few key concepts. When we get to the first “real” application walkthrough (Quicklists) we will focus on building a more complete application with editing/deleting, saving data into storage, and so on.
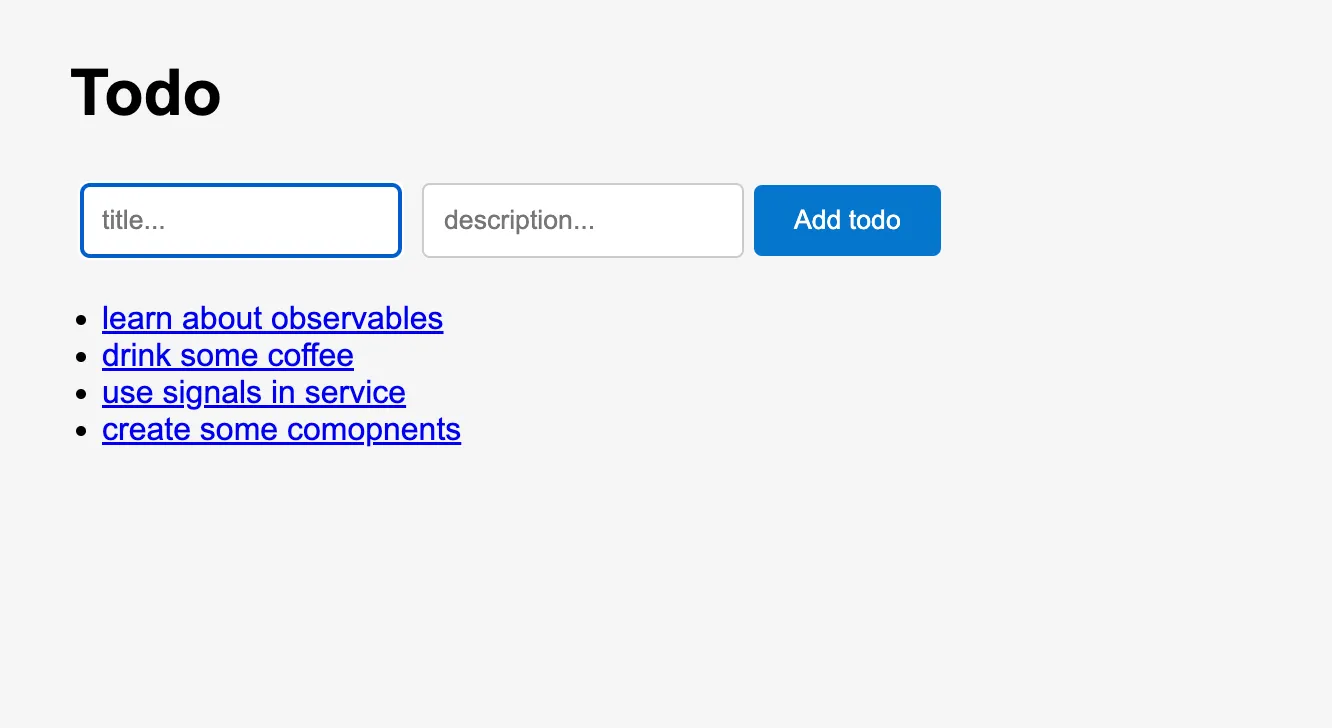
By the end of this example, we should have something that looks like this:

If you’re feeling adventurous, feel free to add your own additions to this application either during or after this module is completed.
Getting Ready
Before we get started, we are going to set up our basic application.
npm install -g @angular/cling new angularstart-todo --defaults --style=scss --inline-template --inline-style --skip-testsWe are supplying some default flags to the Angular CLI to generate the application using the specific style we will be using. Specifically, we will be:
- Using SCSS for our styling
- We will be using “single file components” — meaning that both our template and our styles will be defined in the same file as our component, rather than being split into separate files
- We are not worrying about automated tests in this course, so we can ignore the test files for now
The first thing we are going to do is make sure out root component is set up correctly.
import { Component } from '@angular/core';import { RouterOutlet } from '@angular/router';
@Component({  selector: 'app-root',  imports: [RouterOutlet],  template: `    <router-outlet />  `,  styles: [],})export class App {  title = 'angularstart-todo';}
Your root component should look the same as the above. Now let’s create a component for our main route.
import { Component } from '@angular/core';
@Component({  selector: 'app-home',  template: `<h2>Todo</h2>`,})export default class HomeComponent {}
An important thing to notice here is that we are using:
export default class HomeComponent {}Instead of:
export class HomeComponent {}We will use default for our “smart” or “routed” components — i.e. the
components that we supply to the router to display, not the “dumb” or “ui”
components that we add inside of another component.
The reason for this, as you will see in a moment, is that it makes it easier to supply these components to the router.
Let’s set up the routing now.
import { Routes } from '@angular/router';
export const routes: Routes = [  {    path: 'home',    loadComponent: () => import('./home/home.component'),  },  {    path: '',    redirectTo: 'home',    pathMatch: 'full',  },];
Since we are using that default keyword to export the class, when we are
supplying our component to loadComponent all we need to do is import the
file and it will know that the component to use with the router is the default
export. If we did not mark it as default we would specifically have to handle
selecting the appropriate component from the import, e.g:
{ path: 'home', loadComponent: () => import('./home/home.component').then((m) => m.HomeComponent), },Either way is fine — if you prefer the second approach you can do that.
Ok, that should do for now, let’s move on to the next lesson and get started!